
Drain the Lake Best Upgrades to Buy First
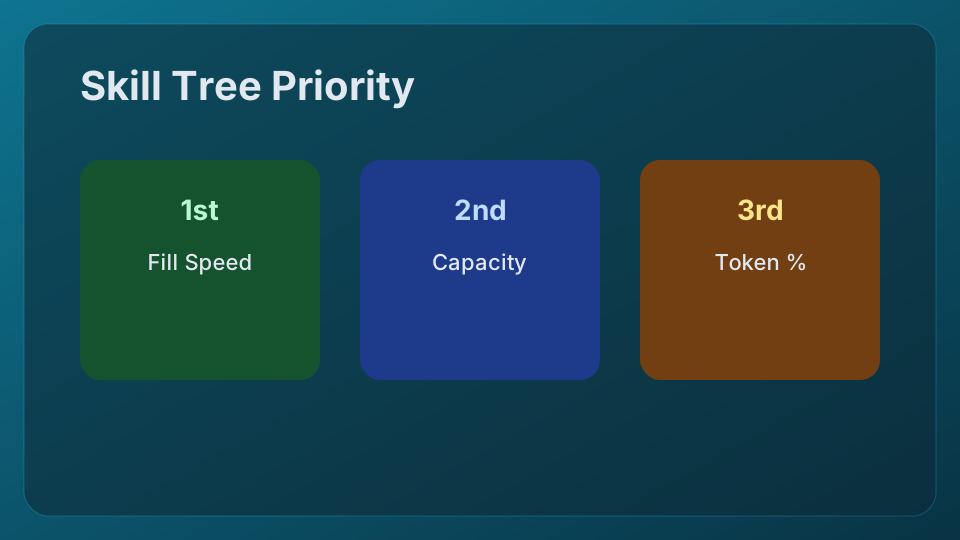
Buy capacity and collection speed first, then rapid drain and Token auto-collection. Fully Trained currently has a 3.9% official daily win rate.
Editorial guide for Drain the Lake by IWTM10GTMPLS. Badge rates and checkpoint names are cross-checked against official Roblox data (last checked 2026-08-17).
Goal
Best Upgrades to Buy First
Difficulty
Easy
Data checked
2026-08-17
Before you start
Use the checkpoint order as your route: Shipwreck, Cavern, Mineshaft, Molten, Lost City, Abyss, then Phone ending.
Spend Tokens immediately on upgrades that reduce repeated fill and drain time.
Treat Shark encounters as part of the route once you are past the early lake depth.
Step-by-step walkthrough
Follow these steps in order. Each step is written so you can complete it in-game without watching a long video.
- 1
Capacity and collection speed
Capacity raises water moved per trip, while collection speed shortens the repeated fill action. Buy whichever cheap node removes the larger current bottleneck.
- 2
Rapid drain and auto-collect
Faster depositing and automatic Token pickup remove station downtime from every cycle.
- 3
Token multipliers next
Percent Token bonuses scale better after the fill and deposit loop is already fast.
- 4
Upgrade buckets with Diamonds
Lobby buckets are a separate Diamond track. Plastic, Metal, and Magnet improve fill speed, capacity, or Token collection without consuming Skill Tree Tokens.
- 5
Finish Fully Trained later
Completing every Skill Tree node awards Fully Trained. Its current official daily win rate is 3.9%, so treat it as a mid/late goal.
Detailed notes
Capacity versus collection speed
Capacity raises the water moved in one trip, but a larger bucket takes longer to fill. Collection speed shortens that fill time. Buy the cheaper node while both are low, then time a cycle to identify which one has become the bottleneck.
The dedicated tips test favors capacity, while the solo gameplay run also gains visibly from Swift Scoop and rapid draining. Together they support upgrading the complete loop rather than maxing one branch in isolation.
Why movement is not the first priority
Walking and swimming upgrades feel good but do not increase the water carried or reduce fill time. The surface teleport removes the longest return journey, so mobility nodes are best purchased when inexpensive or when Shark avoidance is the actual problem.
On PC, the reviewed tips run uses F for the surface teleport. Other platforms should follow the on-screen prompt.
When to buy income and automation
Token multipliers become stronger after capacity and speed already produce frequent deposits. Auto-collection is valuable at that point because it removes a repeated pickup step and prevents Tokens from being left behind during fast cycles.
Finish all remaining nodes only when you are targeting Fully Trained or preparing for Medium and Hard clears.
Pro tips
- ✓Alternate cheap capacity and collection-speed nodes instead of maxing one expensive branch.
- ✓Use teleporting before deciding that walking speed is essential.
- ✓Buy auto-collection once deposits are frequent enough for Token pickup to become repetitive.
- ✓Keep Diamond bucket purchases separate from this Token-only Skill Tree plan.
Common mistakes to avoid
- !Spending early Tokens across every branch with no cycle-time goal.
- !Calling lobby buckets Skill Tree upgrades; they use a separate Diamond path.
- !Maxing movement while capacity and fill time remain slow.
- !Rushing Fully Trained before the Phone ending route is stable.
Verification notes
- Primary intent: how-to. This page focuses on one player task instead of mixing unrelated searches.
- Difficulty estimate: Easy. Use this to decide whether to attempt it now or after more upgrades.
- Updated data stamp: 2026-08-17. Badge names and rates are based on official Roblox data available at that time.
Frequently asked questions
Should I max the Skill Tree before buying buckets?
No. Get early fill/capacity nodes, buy one bucket upgrade, then return to the tree.
What is Fully Trained?
The badge for completing everything in the Skill Tree. The official API reported a 3.9% daily win rate on July 27, 2026.
Sources & update policy
- FoltynPlays — solo Medium upgrade progression
- ItzVexo — Skill Tree priority and teleport tests
- Roblox Badges API — Fully Trained requirement
We update this page when the game receives a meaningful patch or when official badge statistics change. Last game data stamp: 2026-08-01. Current version label: Endless Update.
This is an independent fan guide. Not affiliated with Roblox Corporation or IWTM10GTMPLS.
Next steps
Shorten the complete fill→deposit→collect→return loop. Tokens fund the Skill Tree; Diamonds fund lobby buckets. Capacity, collection speed, and auto-collect produce the clearest repeat-run gains.
Also usefulBest Bucket Guide (Starter to Dragon)Dragon and Jewel are the strongest verified economy buckets. Early players should choose Plastic (+5% fill speed) or Metal (+2 capacity), then target Magnet (1,200 Diamonds) or Ancient (10 badges).
AdvancedHard Mode Guide (Drained and Deranged)Medium → Overachiever. Hard → Drained and Deranged. Bring a tuned Skill Tree and respect Shark pressure.